How to Use Gender API with Make.com Integration

Learn how to easily integrate Gender API with Make.com to automatically determine gender information for your workflows. Step-by-step guide for seamless automation.

Before starting the step-by-step guide, please connect the Gender API Make Integration by clicking the button below.

Connect Integration
Gender API Make

Step-by-Step Guide to Using the Gender API Make Integration

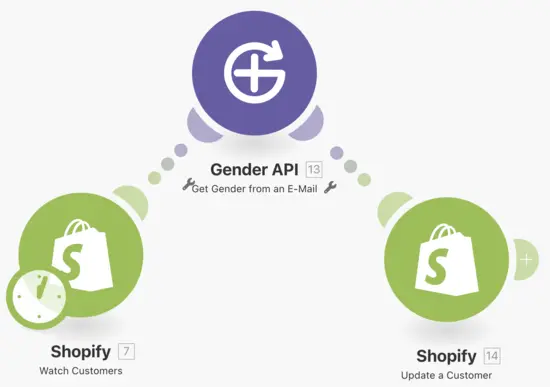
Step 1: Set Up Shopify to Monitor New Customers

  • Create a workflow in the Make.com interface.
  • As the first step, select the Shopify - Watch Customers block. This will automatically trigger when a new customer is added to your Shopify store.

Step 2: Determine Gender from Email Using Gender API

  • In the second step of your workflow, add the Gender API - Get Gender from an E-Mail block.
  • In the Connection section, select the Gender API connection you created earlier. If you haven't created a connection yet, click the "Add" button to create a new one.
  • In the E-Mail field, link the customer's email address received from Shopify. Use the relevant email variable from the Shopify data.
  • Optionally, you can specify the customer's Country Code to improve the accuracy of the API results.

Step 3: Update Customer Information

  • In the final step of the workflow, add the Shopify - Update a Customer block.
  • Update the customer's information in Shopify with the gender data determined by the Gender API. Match the Shopify data to the correct fields.

Step 4: Test the Workflow

  • Test your workflow to ensure that all steps are working correctly. Verify that when a new customer is added, the system automatically retrieves the gender from the Gender API and updates it in Shopify.